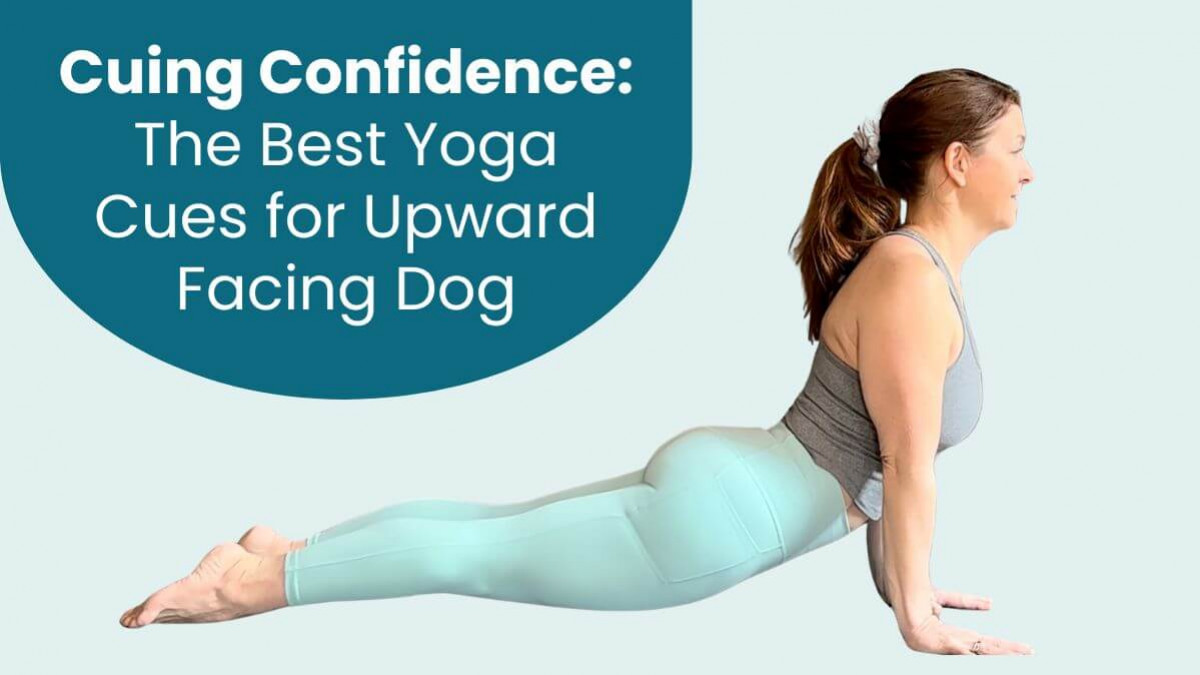
Cueing Confidence: The Best Yoga Cues for Upward Facing Dog

Anatomy Informed Cues For Yoga Teachers
.
Have you ever considered what the best yoga cues for upward facing dog are? While there are many great cues, it's valuable to know what some of the best ones are!
.
Upward Facing Dog is a posture commonly taught (and sometimes avoided) and yet I know from talking to hundreds of yoga teachers that there is often a lot of confusion on how to teach this posture. As a result, upward facing dog often becomes the posture that teachers call out but don't really give much guidance to. Have you found yourself ever doing that? It's like, "Oh, this is where upward facing dog goes, but I don't really know the best cues, so I'll just get them to downward facing dog from here!"
.

.
You and I both know that's not really a fair approach, and certainly not the one that is going to get students to trust us and keep coming back to classes!
For the sake of dealing with your own imposter syndrome and to really support your students, it's crucial to understand the basic anatomy and alignment and the best yoga cues for upward facing dog.
.
In this article, I share the four best yoga cues for upward facing dog. Of course, it's important to look at what students are actually doing before you determine the most important cues to use in the moment. The cues I am about to share, however, are commonly needed. They focus on the foundation of the posture, which is generally the best place to start with any posture!
.
Before we dive in - If you want access to 16 Anatomy Informed Yoga Cues to Start Using Right Now, go grab the Yoga Teacher's Cheat Sheet Right Now!

.
#1. “Stretch your toes out as far as you can.”
The action of stretching the toes out immediately widens the base of support. A wider base of support provides a more stable foundation for the posture. A stable foundation is key to creating the experience of strength and support in upward facing dog .
Stretching the toes out also requires activation of the muscles in the foot and lower leg. As a result, the muscles throughout the entire leg tend to engage. Give this a try wherever you are. Just stretch your toes out and notice if other muscles in your leg seem to fire up!
.
#2. “Press the tops of your feet down into the ground.”
In postures where the sole of the foot is on the ground, I would cue “press the four corners of the feet down into the ground.” In upward facing dog, the tops of the feet are generally touching the mat, so it makes sense to say tops of feet.
.

.
But why is it so important to press the feet down? Pressing the feet down creates a grounding. And I am not just talking esoteric language here. When you press down into the Earth, there is an equal and opposite reaction. Thank you Sir Isaac Newton for educating us on that! That opposite reaction is a force from the Earth that creates a lift in your physical body!
.
If you want students to experience a lift up in upward facing dog, cue them to press down!
.
The feet are not the only part of the body touching the ground in upward facing dog! The hands are the other half of the foundation! Hence, the other two best cues for upward facing dog focus on the hands!
.
#3 “Stretch your fingers out as far as you can.”
.

.
Just like stretching the toes out creates a wider base of support at the feet, stretching the fingers out creates a wider base of support at the hands. And like we examined in the foot, when you stretch your fingers out, you also activate a lot of muscles in the arm and even the shoulder!
In addition to creating more stability and activating more muscles, this can also be quite useful for preventing wrist pain. And let’s face it, if you teach yoga, you have heard people complain of wrist pain. Help them limit their pain with this simple cue!
.

.
#4. “Press the four corners of your hands down into the ground.”
Are you catching on here? Since the hands are the other major aspect of the foundation of upward facing dog, it’s important to use a cue to get students to press down into earth with the hands. This action will result in a lift of the upper body up and away from the Earth. Consider that you don’t need to tell someone to lift their chest up, rather just tell them to press their hands down!
While stretching the fingers out will help limit wrist pain, so will pressing the four corners of the hands down! The “four corners” is key as that is what creates an equal distribution of weight and force through the whole hand and arm. When the forces are evenly distributed, there is likely to be less pain in any specific area of the wrist or hand!
.
So there you have it! Four simple, but very useful cues for upward facing dog. In summary, stretch the fingers and toes out as far as you can; And press the tops of the fet and the four corners of the hands down into the ground. The pressing down will create a lift up!
.

.
Give these cues for upward facing dog a try! I recommend you get on your mat and experience them for yourself first. Then go ahead and start using them in your classes right away!
.
As yoga teachers, we have the opportunity to guide our students towards safe, effective, and empowering alignment in each posture. By incorporating these anatomy-informed cues into your teaching, you can help students deepen their understanding of Upward Facing Dog and experience its full benefits.
.

.

If you're eager to expand your toolkit of anatomy cues, grab the Free Yoga Teachers Cheat Sheet: 16 Anatomy Informed Cues to Use Right Now. It's packed with anatomy informed cues that I have refined using my twenty+ years experience as a doctor of physical therapy, an anatomy professor, and a yoga teacher.
These are the exact cues I use in my yoga anatomy courses and yoga teacher trainings to ensure teachers are confident with teaching anatomy informed yoga!
Go from “I can’t learn anatomy” to teaching anatomy informed yoga classes. Your students will not only feel safe, but excited to learn from you and keep coming back!
Categories: : Effective Teaching Techniques, Foot & Ankle, Wrist & Hand, Yoga Anatomy
 Trish Corley
