Neutral Pelvis in Yoga is Bio-mechanical Magic!

Enhance your yoga practice & teaching by understanding the anatomy of neutral pelvis.
.
Explore Neutral Pelvis: A Guide to the Bio-mechanical Magic!
"Are you a yoga teacher who wants to enhance your practice with clarity and confidence? If the answer is yes, then you have come to the right place. In this blog post, we will explore that anatomy of the pelvis, neutral pelvis, and the magic that neutral pelvis can have on all yoga postures. Elevate your teaching by learning the movements of the pelvis and how to obtain neutral pelvis."
.

I have witnessed so many students experience the benefits of obtaining a neutral pelvis in yoga practice and other functional activities. A neutral pelvis can improved balance, provide relief from back pain, and simply make it easier to do a lot of yoga postures! It's like magic!
.
My primary focus in coming into this yoga posture is on neutral pelvis! It gives me access to this big backbend without pain or discomfort. I actually feel free to expand!
.
.
Understand the Anatomy of the Pelvis!
.

.
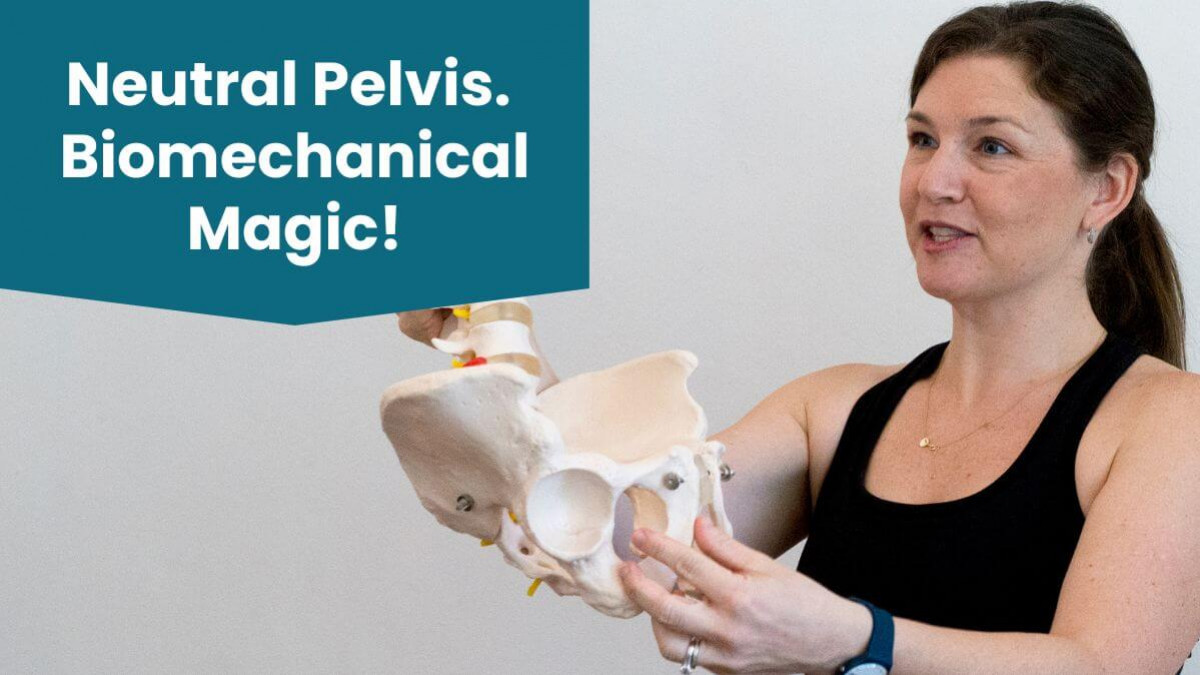
The pelvis consists of four key bones. There are two ox coxa (or two pelvic bones) that resemble the shape of elephant ears, the sacrum, and the coccyx (tailbone). It is also important to note that the femur bone is connected to the pelvis via the hip joint. Also, the last lumbar vertebrae (L5) is connected to the sacrum via a joint that is often referred to as the lumbo-sacral junction.

Take a look at the photo above and see how large the pelvic bones are. They have several notable landmarks:
- The iliac crests are the top part of the pelvis.
- The "hip points" are the bony prominences in the front of the pelvic bone. They are anatomically referred to as the ASIS (Anterior Superior Iliac Spine).
- The pubic bones come together at the pubic symphysis and are located just above the genitals.
- The "sit bones" are at the bottom of the pelvic bones. Note their rounded shape and location. They get called the "sit bones" as these are the bones we sit on.
.
Explore the Anatomy of Your Own Pelvis
Now that you have looked at the anatomy in the photos, find it on your own body! Use your hands to explore and feel for the bones of your pelvis.
.
Start at your "Hip Points." Many yoga teachers refer to the two prominences known as the ASIS as the "hip points." This seems to work for most students. Can you find yours? They are located in the front of your pelvis on either side, somewhere below your belly button. They are the most prominent bony tissue so therefore relatively easy to locate.
.
Next, locate your iliac crests. Move your hands up from your "hip points" to the top of the pelvic bones. This is the place where you likely put your hands when your are told to "put your hands on your hips." Follow the curve of these two large bones to the backside of your body. Notice how they they come towards each other and are met by a flatter surface area. This triangle-shaped bone is you sacrum. There are joints between the pelvic bones and sacrum and they are called the sacro-iliac joint. If you've heard reference to the SI joint, that's it! Just below the sacrum is the coccyx bone, commonly referred to as the tailbone. The tailbone is palpable via anal penetration, but I wouldn't recommend that right now!
.
You can find your "sit bones" though! While yoga teachers commonly refer to them as "sit bones" they are anatomically called the ischial tuberosities." You might feel them when you sit on a hard surface. Go ahead right now and feel for them with your hands!
.
Lastly, locate your pubic bones by feeling for the bony prominence above your genitals. This is where the two pelvic bones meet each other. This is called the pubic symphysis. Remember that the pubic bones are all part of the pelvis.
Movements of the Pelvis
While most joints in our body provide for mobility, the SI joint has limited mobility. It is build for stability! For practical sake, you can assume that the two pelvic bones, sacrum, and tailbone all move together during yoga practice.
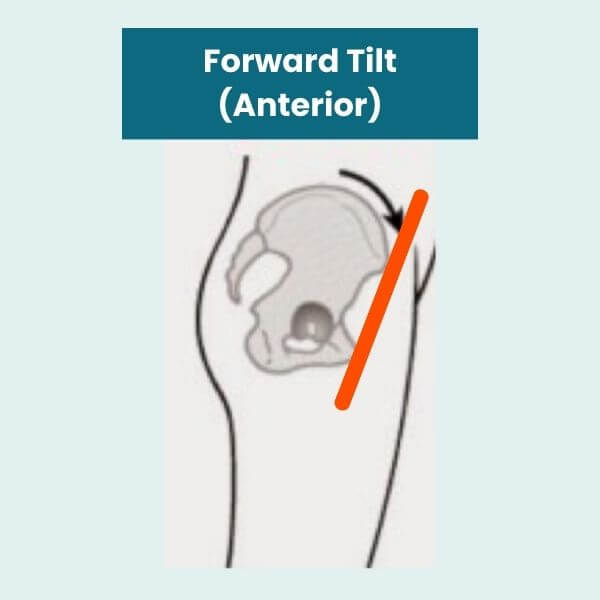
The two key movements for today are forward tilt (anterior tilt) and backward tilt (posterior tilt).
Neutral pelvis is the position between a forward tilt and a backward tilt.
 |  |  |
Finding Neutral Pelvis
Finding your neutral pelvis can be difficult but is important for yoga teachers, yogis, and anyone looking to improve their posture. Neutral pelvis is the optimal position in which the front of the pubic bone is in line with front hip points (ASISs). Not all pelvises are built the same. So neutral pelvis may vary from person to person, but the pubic bone in a vertical line with the front hip points (when standing) is a good starting point. See the red lines in the photos for reference.
.
To find your neutral pelvis, stand in a comfortable position. Tilt your pelvis forward and backward. Go for it, you might feel your inner stage dancer shine! Repeat these pelvic motions many times and keep your hands on your pelvis. Notice what you feel. Which position feels easier for you?

.
Neutral is going to be somewhere between the forward tilt and backward tilt. Stop when you feel like you are in the middle of the two positions. Then check your bony alignment. Locate your "hip points" and your pubic bones. Are they in line vertically with each other? If so, you likely found your neutral pelvis. If not, can you move your pelvis forward or backward more to get to neutral?
.
Be patient and keep exploring your neutral pelvis. Start with standing and then move into other positions. Some people actually find it easier to access neutral pelvis while lying on the floor with their knees bent (as if preparing for bridge pose). Once you have a better understanding of your neutral pelvis, explore it in other yoga postures. Can you find it in bird dog?
.
Obtaining Neutral Pelvis in Plank

.
Many students find plank pose challenging and it makes sense!
We live in a world with gravity. The position of the pelvis relative to gravity will have an impact on the muscular output required to obtain a neutral pelvis. Plank is likely one of the most challenging positions to obtain neutral pelvis.
But if you can teach your students how to obtain a neutral pelvis in plank, they will start to the feel the biomechanical magic. That's the thing -- it's not always easy to obtain optimal and neutral alignment, but doing so will make the yoga postures easy!
.
Obtaining a neutral pelvis during postures can provide the power, freedom, and ease of movement that most people strive for when practicing yoga or other physical activities. This can help to improve posture and core stability, as well as increase strength throughout the body. By teaching students how to obtain a a neutral pelvis, we may be providing the relief of back pain they're searching for.
.
One thing that many years of practicing physical therapy and teaching yoga has taught me is this: There is no magic pill. But there does seem to be magic in healthy and mindful movement. If you are a yoga teacher, learning more about anatomy gives you the tools to teach healthy and mindful movement!
.
If you are a yoga teacher and want to teach from a clear understanding of anatomy so that your students can live a longer and healthier life, the Yoga Anatomy School’s Foundations course is for you!

Module 6 of Foundations covers the anatomy of the pelvis and valuable tools to access neutral pelvis! Your students might think you have a magic tool box after this course!
Yoga Anatomy School offers online and in person courses to make learning anatomy easy and practical!

All 14 modules of the Foundations Course are available inside the Yoga Anatomy School Membership!

Categories: : Yoga Anatomy, Pelvis
 Trish Corley
